Customize toolbar
- Sal Hamerman
Updated 03/2019
Jump to section:
Toolbar editor
Add, delete, and rearrange buttons from the default client toolbar.
Menu items are in alphabetical order and match the categories from the main OCLC menu: Action, Authorities, Batch, Cataloging, Edit, File, Help, Tools, View, and Window.
To add icon to toolbar: open the Toolbar Editor window (Tools > Toolbar Editor)

Scroll the Menu Items list. When you find a button you want to add, click and hold it, and then drag and drop it where you want it to appear on the toolbar.
The image of the button also remains in the Toolbar Editor list, but you cannot add the button to the toolbar again.
When finished, click Close, or press <Enter>.
To remove icon from toolbar:
Open the Toolbar Editor window (Tools > Toolbar Editor).
Click the button you want to remove and hold it, and then drag and drop it into the Toolbar Editor Menu Items list.
When finished, click Close, or press <Enter>.
Display toolbar in 1 or 2 rows
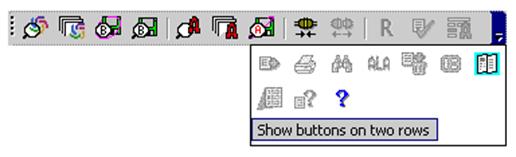
To display icons in 2 rows: Click the arrow on the main client toolbar (located at the right end if the toolbar is horizontal or on bottom if toolbar is vertical:
![]()
The drop-down shows any overflow toolbar buttons and provides a command to toggle between showing the main toolbar on one row or two:
Reposition toolbars
Use drag and drop to re-position toolbars:
- Horizontally at the top or bottom (above the status bar, if the status bar is displayed) or vertically at the right or left of the client window (default position: top).
- In relation to each other within the top, bottom, right, or left location.
1. Move the cursor over the "grab bar" (shaded dots) of a toolbar. If a toolbar is at the top or bottom of the client window, the grab bar is on the left; for example, ![]() If a toolbar is at the right or left, the grab bar is at the top.
If a toolbar is at the right or left, the grab bar is at the top.
2. When the cursor becomes a 4-pointed arrow, click and hold the grab bar, and then drag and drop the toolbar to a different position.
(The client retains the positions of toolbars when you close and reopen the program and when you upgrade to a new version.)
Reposition toolbar buttons
To reposition toolbar buttons: Press and hold the <Alt> key while you drag and drop a button in the toolbar to a new location.
Show or hide toolbars
By default, all toolbars are displayed. To toggle between hiding or re-displaying:
Click View > Toolbars, and then click
Client or WorldCat Quick Search or Quick Tools
A check mark indicates which toolbar(s) are displayed.
Note: For purposes of displaying or hiding, the text strings and user tools quick tools are a single unit.
Toolbar button size
Tools>Options>Toolbar
Button sizes: choose radio box Standard or Large
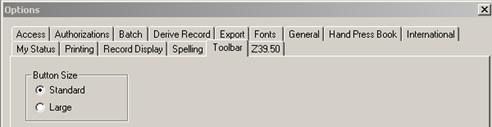
NOTE: you must logoff and logon again for the change to take effect.